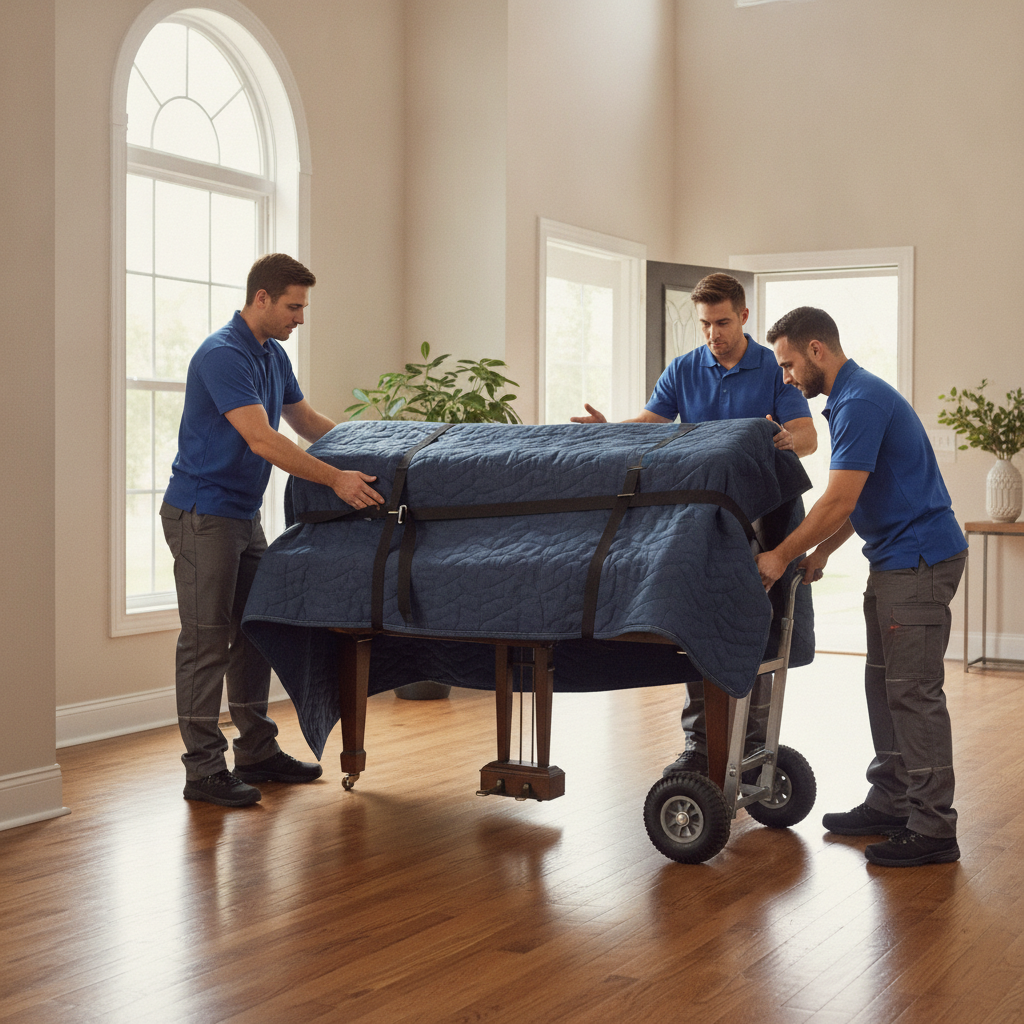
How to move a piano safely means planning the route, stabilizing the instrument, and using the right gear with a trained team. Uprights often weigh 300–500 pounds and grands can exceed 700, so stability and communication are critical. Done correctly, you protect the piano’s frame, keys, and your home—while avoiding injuries.
By Let’s Start Moving • Last updated: 2026-06-29
Quick Summary
The fastest, safest path to move a piano: assess weight and size, measure every doorway and turn, assemble a 3–5 person crew, pad and strap the cabinet, use a 4-wheel piano dolly or skid board, protect floors, and keep hands off moving parts. When in doubt, hire licensed, insured specialists.
- Primary goal: zero injuries and zero damage—plan before you lift.
- Ideal crew size: 3–5 people with one lead spotter calling directions.
- Essential gear: moving blankets, straps, corner protectors, piano dolly.
- Measure first: doorways (28–36 in typical), stairs, turns, and landings.
- Stabilize keys and lid; remove casters if loose; never lift by legs.
Introduction
A piano is a precision instrument and heavy furniture piece. Safe moves rely on route planning, proper protection, and synchronized lifting. The best approach combines pro-grade equipment, a trained team, and clear roles so the cabinet stays balanced and your floors, railings, and walls remain unscathed.
Pianos are unique: high weight, odd dimensions, delicate finishes, and moving parts. That combination makes them risky to handle like ordinary furniture. You’re balancing gravity, grip, and geometry at once.
At Let’s Start Moving, our licensed, insured crews handle specialty items daily—pianos, appliances, hot tubs, and more. In this expert guide, we share practical steps, safety checks, and pro tips you can use immediately, whether you’re supervising a move or deciding when to call specialists.
Before You Start (Prerequisites)
Confirm the piano type and weight, walk the full route, and assemble gear and people before you budge the instrument. A short pre-move checklist prevents last-second surprises that cause damage or strains. Treat setup as a mini project plan with roles, tools, and clear stop/go criteria.
Know your instrument
- Type and weight: spinets/console uprights often 300–400 lb; studio uprights 400–500 lb; baby grands 500–650 lb; larger grands can exceed 700 lb.
- Center of mass: Uprights are top-heavy; grands shift weight to bass side.
- Fragile zones: Keys, pedals, legs, music rack, and the finish (easily scuffed).
Survey the path
- Measure openings: Interior doors often 28–36 inches; confirm heights and tight turns.
- Stairs and landings: Count steps, check tread depth, confirm handrail clearance.
- Flooring: Add runners for hardwood/tile; protect thresholds.
- Hazards: Loose rugs, low fixtures, narrow corners—remove or pad them.
People and gear
- Team: 3–5 adults with one designated lead giving commands.
- Equipment: heavy moving blankets, corner protectors, high-tension straps, 4-wheel piano dolly, skid board for stairs, stair-climbing hand truck if needed.
- Protection: work gloves with grip, floor runners, door jamb protectors, tape/shrink wrap for lids and benches.
Here’s the thing: investing 15–20 minutes in prep prevents the majority of last-mile mistakes. We’ve found that most incidents track back to skipped measurements or unclear roles—both are easily fixed before the first lift.
Step-by-Step Process
Stabilize the piano, pad it thoroughly, strap it to a dolly or skid, and move in short, controlled increments with one caller. Keep the cabinet vertical, fingers clear, and the path protected. Never lift by legs or pedals; lift from the base rails with synchronized, counted moves.
Step 1: Secure lids, keys, and pedals
- Close and wrap: Lock the keyboard cover (if available), lower the top lid, and wrap with stretch film to prevent shifting.
- Protect pedals: Pad and tape lightly to avoid scuffs or bending.
- Remove small accessories: Music stand items and loose benches go separately.
Step 2: Blanket and corner protection
- Full coverage: Layer moving blankets over all finished surfaces.
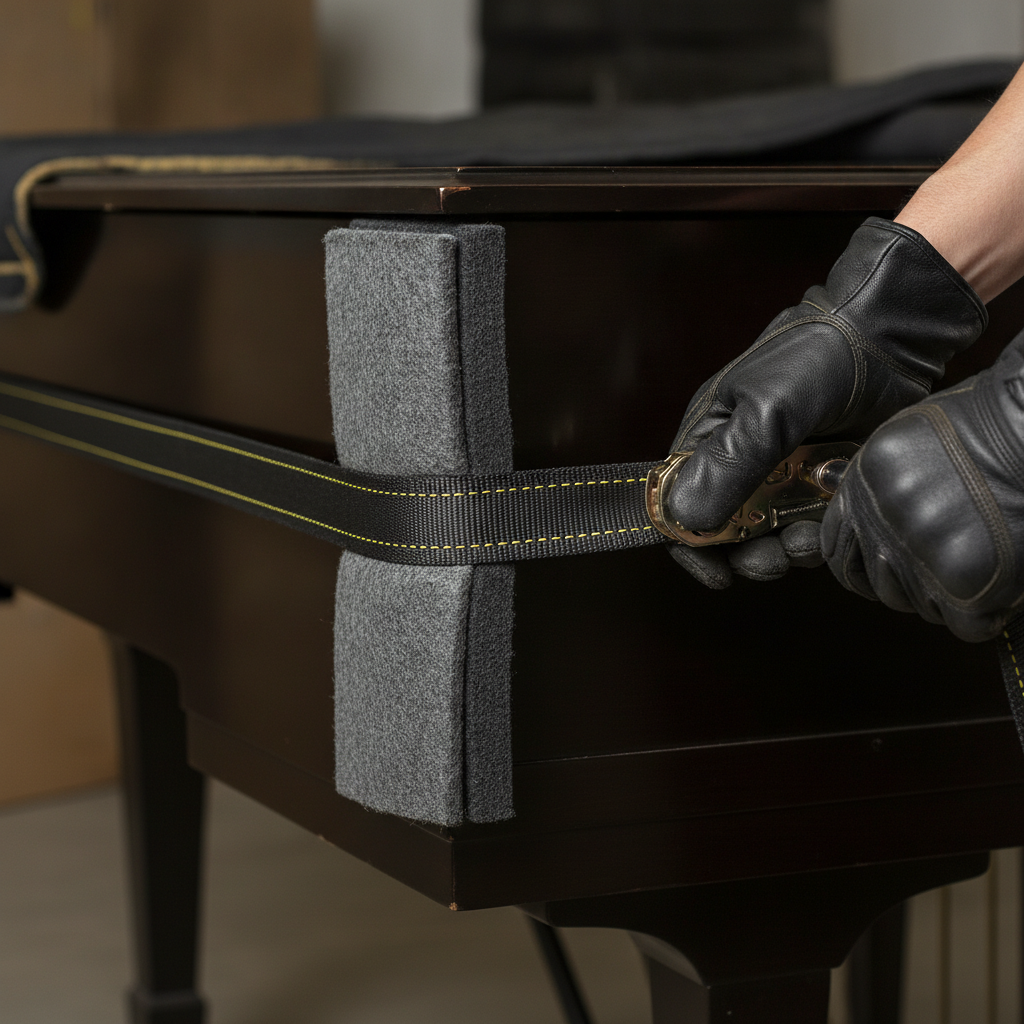
- Corners/edges: Add plastic or foam guards on sharp edges.
- Secure wraps: Use straps or stretch film to keep pads tight.
Step 3: Position the dolly or skid board
- Uprights: Slide a 4-wheel piano dolly under the base at balance point; keep the cabinet upright.
- Grands: Remove lyre and one leg per manufacturer guidance; tilt gently onto a skid board with pads underneath.
- Check balance: Rock slightly to confirm a stable center before rolling.
Step 4: Strap and test
- High-tension straps: Run straps around the body and dolly/skid; tighten evenly.
- Shake test: Apply light lateral pressure; nothing should slip.
- Dry run: Push a few feet to confirm turning clearance.
Step 5: Protect the path
- Floor runners: Lay ram board or neoprene runners in high-friction areas.
- Door jamb pads: Tape or clamp foam to protect paint and trim.
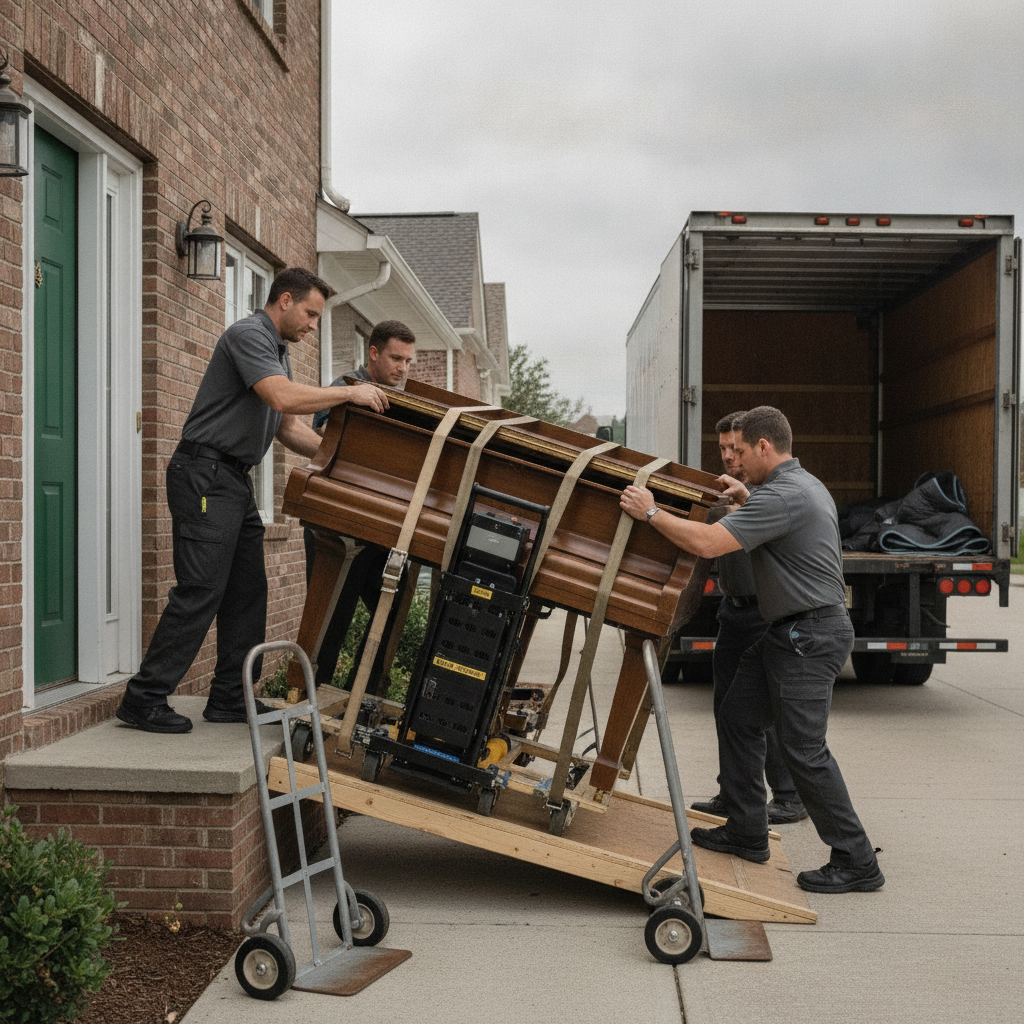
- Ramp angle: Keep ramps shallow; slow, steady roll reduces tipping risk.
Step 6: Navigate doors and tight corners
- Call the turn: Lead spotter counts “3-2-1” for each move.
- High side support: For uprights, keep a hand high on the side panel to counter top-heaviness.
- Micro-adjust: Take small, deliberate pivots—no sudden twists.
Step 7: Handle stairs
- Skid method: On a skid board, one or two spotters above manage descent with straps; two below guide and stabilize.
- One step at a time: Land fully on each tread before the next move.
- Rest points: Use landings to reset grip and check straps.
Step 8: Load the vehicle
- Ramp alignment: Straight, centered approach to avoid side loads.
- Tie-downs: Use e-track or rings; cross-strap high and low to prevent sway.
- Block and brace: Add chocks around the dolly/skid to immobilize.
Step 9: Unload and place
- Reverse steps: Maintain the same discipline—slow, counted moves.
- Final inches: Lift, don’t drag, to fine-tune the placement.
- Reassemble: Reinstall legs/lyre on grands per guide; remove wraps carefully.
Step 10: Post-move checks
- Visual inspection: Finish, keys, pedals, and seams.
- Level and settle: Let the instrument acclimate before tuning.
- Document: Note any scuffs immediately while the team is present.
Equipment Checklist (What You’ll Need)
You’ll need protective pads, high-tension straps, a 4-wheel piano dolly (for uprights) or skid board (for grands), floor protection, and tie-downs. Gloves with grip, door jamb protectors, corner guards, and stretch wrap protect the cabinet and your home. Quality gear reduces force, friction, and risk.
- Moving blankets (6–10 for uprights; 10–14 for grands)
- Corner and edge protectors
- High-tension moving straps and ratchet straps
- 4-wheel piano dolly or skid board; stair-climbing hand truck if needed
- Floor runners/ram board and threshold protectors
- Stretch wrap and painter’s tape
- Work gloves with rubberized grip
- Tie-downs and chocks for transport
We recommend pro-grade equipment because ratings matter. Straps should comfortably exceed expected loads, and dollies must roll smoothly without “stiction.” Gear that glides lets you direct attention to balance and communication instead of fighting friction.
DIY vs. Professional Piano Movers (Comparison)
DIY can work for short, obstacle-free moves of smaller uprights with a skilled crew and proper gear. For stairs, tight turns, or any grand piano, professional specialists are the safer path. Pros bring training, specialized equipment, insurance coverage, and practiced coordination.
| Factor | DIY Move | Professional Movers |
|---|---|---|
| Suitable Pianos | Small uprights, short distance | All types, including grands |
| Obstacles | Best on flat paths, few turns | Stairs, narrow halls, complex angles |
| Equipment | Basic dolly, pads, straps | Skid boards, stair climbers, rigging |
| Risk Exposure | Higher risk of damage/injury | Lower risk, insured coverage |
| Crew | Friends/family, variable skill | Trained, coordinated teams |
| Time & Stress | Often longer, stressful | Streamlined, managed process |
If any leg removal, stair skids, or long carries are involved, we advise bringing in specialists. The best move is one you finish safely on the first attempt.
Buying Guide: Choosing the Right Piano Moving Gear
Select gear by piano type, route complexity, and load ratings. A well-matched dolly or skid board, quality straps, and thick blankets do most of the safety work. Prioritize stability and control over speed—smooth roll and balanced support beat brute force every time.
Dollies and skids
- Piano dollies: Low, wide stance with non-marring wheels; ideal for uprights on level paths.
- Skid boards: Thick, padded boards for grands and stairs; pair with straps and spotters.
- Wheel material: Poly or rubberized wheels reduce floor scratches and vibration.
Straps and protection
- Strap type: Use high-tension webbing with reliable ratchets; avoid worn hardware.
- Edge guards: Prevent strap abrasion on cabinet edges and corners.
- Wraps and pads: Thicker blankets reduce pressure points and finish marks.
Path control
- Runners: Add traction where floors are slick; cover thresholds.
- Door and wall pads: Foam pads protect paint and trim in tight spaces.
- Chocks: Simple wedges stop unintended rolling during pauses.
Remember, good gear is a force multiplier. It widens your margin of safety and lowers the physical demand on your crew.
Common Mistakes to Avoid
The biggest mistakes are rushing, underestimating weight, lifting by fragile parts, and skipping measurements. These lead to scuffs, cracked legs, pinched fingers, and strained backs. Slow down, assign roles, and treat every transition—doorway, ramp, stair—as its own mini step.
- Skipping measurements: Tight corners feel tighter under load; measure twice.
- Lifting by legs or pedals: Always lift from the base rails, never hardware.
- Under-padding: Exposed corners are what walls “find.”
- Uneven strapping: Slack on one side creates torsion and slippage.
- Poor communication: No move happens until the caller counts it in.
- Improvised ramps: Too-steep, unstable ramps increase tipping risk.
Troubleshooting: When Things Get Tricky
If the piano feels tippy, stop and rebalance on the dolly or skid. For doors that “almost” clear, change angle or temporarily remove the door. On stairs, reset on each tread. When a move demands leg removal or complex angles, pause and call specialists.
It’s too top-heavy
- Action: Lower center of gravity by adjusting strap height; add a high-side spotter hand.
- Check: Wheels tracking straight? If not, reposition on the dolly.
Doorway clearance is tight
- Action: Remove door from hinges for an extra inch; pivot cabinet diagonally.
- Check: Add jamb pads; slow to half-speed through the turn.
Stairs feel unsafe
- Action: Switch to skid with two straps above and two spotters below.
- Check: Confirm landing size before committing to the next flight.
When in doubt, don’t “push through.” Reset, re-pad, or escalate to a professional crew trained in specialty item handling.
Advanced Tips (Pro Techniques)
Pros reduce risk with micro-movements, redundant tie-downs, and route choreography. They measure clearances twice, build staging areas near bottlenecks, and use skid boards for controlled friction on stairs. Small optimizations add up to safer, smoother moves.
- Choreograph the route: Pre-stage pads and runners at each bottleneck.
- Use redundancy: Secondary straps back up primary tie-downs.
- Mind the slope: Keep ramps below steep angles; slow beats strong.
- Protect fingers: Hands off pinch points; use rails and straps instead.
- Pause checks: Thirty-second inspections at every threshold and landing.
We’ve learned over a decade that consistency wins: same commands, same checks, same pace—every time.
When to Hire Specialists
Hire licensed, insured piano movers when stairs, narrow turns, or grand pianos are involved—or when you lack a 3–5 person crew and proper equipment. Trained teams bring skid boards, stair climbers, and risk protocols that dramatically lower the chance of damage or injury.
Specialty movers exist for a reason: pianos combine weight and delicacy. If your path includes multiple flights, sharp turns, or leg removal, a professional crew is the safest route. For helpful context on typical challenges, this overview of obstacles in piano moving explains why planning and the right gear matter—see this guide to common challenges.
For perspective on why DIY can be risky in many homes with stairs and tight corners, review this practical caution from another mover’s don’t-move-it-yourself article. And for a general sense of the move flow, here’s a brief overview of professional piano movers.
Thinking it’s safer to bring in pros? Our licensed, insured team handles uprights and grands with pro-grade gear and a choreographed process. Have questions or want a fast video quote? Talk to Let’s Start Moving.
Post-Move Piano Care
After placement, let the piano acclimate to the room’s temperature and humidity before tuning. Re-check level and pedals, remove pads carefully, and inspect for micro-scuffs. Most instruments benefit from tuning after a settling period to restore pitch stability.
- Acclimate 1–2 weeks before tuning, especially after climate changes.
- Level feet to avoid cabinet twist; re-check caster locks.
- Lightly clean finish after pad removal; avoid harsh chemicals.
FAQ: How to Move a Piano Safely
The fastest answers: use a 3–5 person team, pro-grade pads and straps, and a piano dolly or skid board. Measure every opening, keep the cabinet vertical, and move in short, counted steps. For stairs, grands, or tight turns, hire licensed, insured specialists.
Can you move a piano without a dolly?
It’s possible but not recommended. A low, stable dolly or a padded skid board reduces friction and keeps the cabinet balanced. Without wheels or a skid, you increase the risk of tipping, floor damage, and injuries.
How many people are needed to move an upright piano?
Plan for 3–5 adults. One person leads and calls moves, one stabilizes the high side, and others manage the dolly or skid. The heavier or more complex the path, the closer you should be to five people.
Is it safe to move a grand piano without removing legs?
For most grands, safe transport involves removing at least one leg and the lyre, then using a skid board. Keeping legs attached increases leverage on fragile joints and makes turns and stairs far riskier.
Do I need to tune the piano right after the move?
Wait until the piano acclimates to the new room’s temperature and humidity—often one to two weeks. Moving can shift pitch slightly; tuning after settling helps the instrument hold tune better.
Additional Resources
Bookmark this checklist and process, then brief your crew before move day. If any part of the route includes stairs, narrow turns, or a grand piano, hiring specialists is the safest way to protect your instrument, your home, and your back.
- Printable checklist: prerequisites, gear list, and the 10-step process.
- Route sketch: draw doors, halls, and stairs with measurements.
- Aftercare: plan a tuning once the instrument acclimates.
Conclusion
Safe piano moving blends planning, protection, proper gear, and team coordination. Measure everything, stabilize the cabinet, pad generously, and move in short, counted steps. When routes are complex or a grand is involved, licensed, insured specialists deliver the best safety margin.
- Key takeaways: measure first, pad fully, strap securely, move slowly.
- Teamwork wins: one caller; everyone else listens and executes.
- Know your limits: tricky routes and grands call for specialists.
Next step: Want a safe, streamlined piano move handled by trained professionals? Contact Let’s Start Moving for expert help.