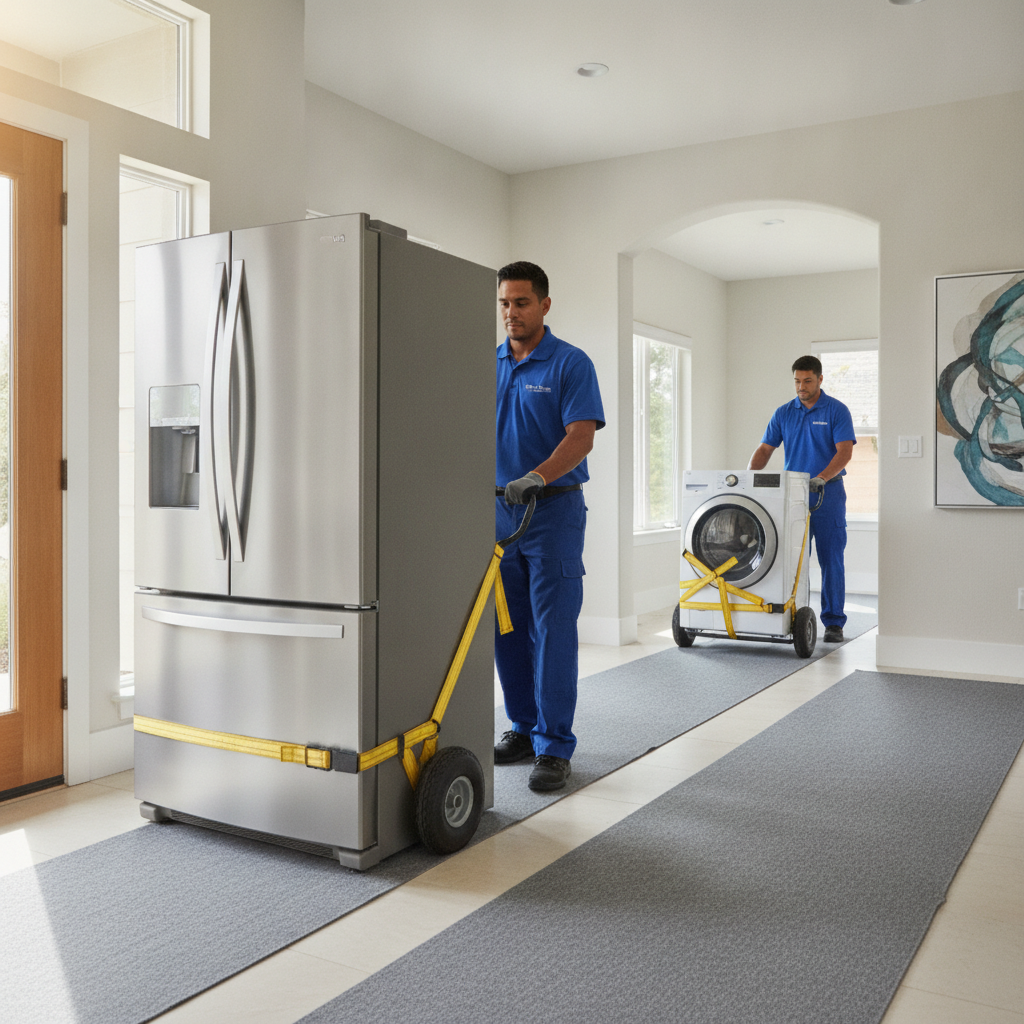
Appliance moving tips are the proven steps, tools, and safety checks that prevent damage to refrigerators, washers, dryers, ranges, and dishwashers during a move. These tips reduce injury risk, protect floors and doorways, and keep warranties intact. Use them to plan, prep, disconnect, secure, and transport appliances with confidence.
By Let’s Start Moving • Last updated: 2026-07-05
Overview and Table of Contents
This complete guide organizes everything you need to move appliances safely: prerequisites, step-by-step methods by appliance, tools, best practices, troubleshooting, and pro insights. Skim the summary, open the checklists, and follow the steps to lower risk, save time, and keep your kitchen and laundry gear working after the move.
Moving large appliances isn’t only about muscle. It’s logistics, sequencing, and protection. In our experience, the best results come from early prep, the right gear, and clear roles on moving day.
- What you’ll learn:
- Pre-move safety checks and manufacturer-friendly prep
- Step-by-step playbooks for refrigerators, washers, dryers, ranges, and dishwashers
- How to choose and use dollies, straps, sliders, and floor protection
- Troubleshooting common snags (stuck water lines, narrow doorways, tip-over risks)
- When to call licensed and insured appliance movers
- Why it matters:
- Appliances are heavy and center-weighted—tip-over incidents happen fast
- Water, gas, and electrical connections require safe shutdown and verification
- Doorways, stairs, and tight corners need precise path planning
At a glance
- Clear 36 inches of pathway width where possible
- Defrost refrigerators 24 hours before move; keep doors propped during transport
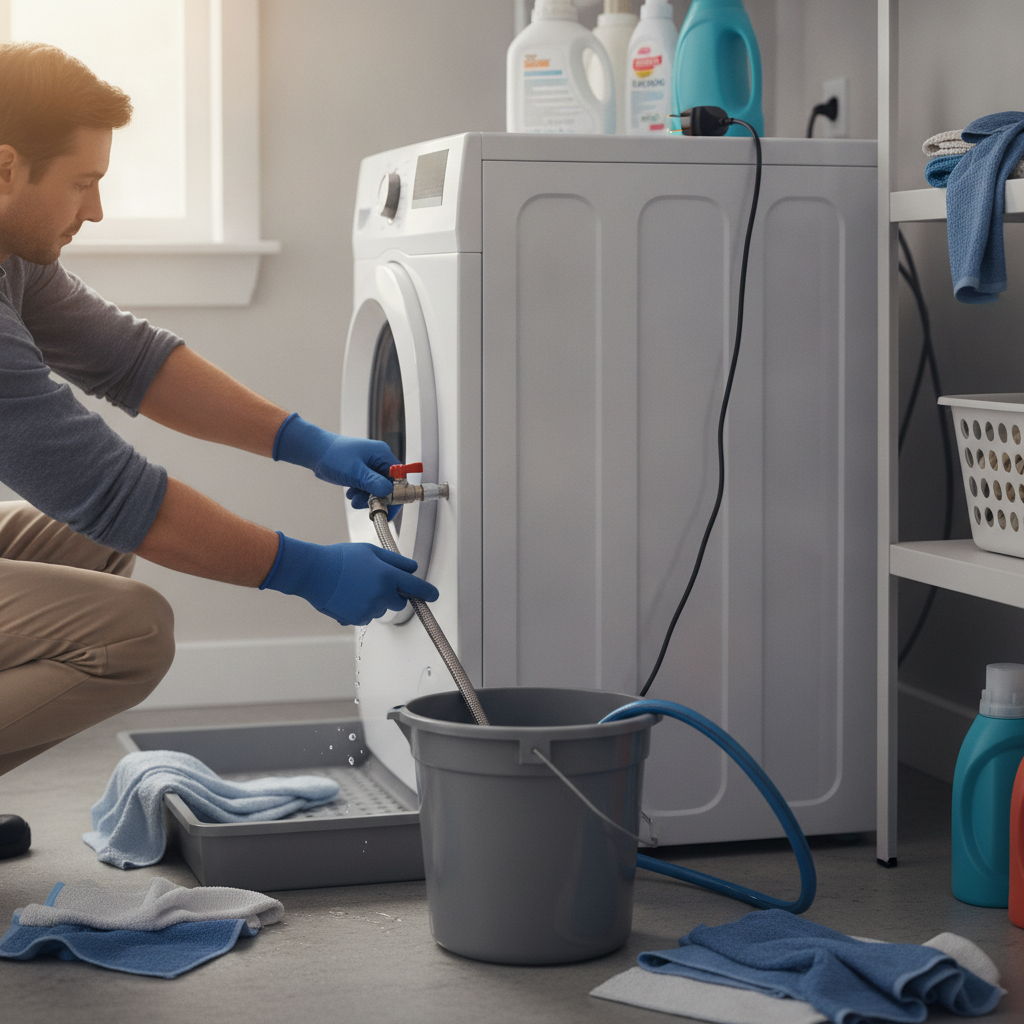
- Cap water lines, drain hoses into a bucket, and dry drums
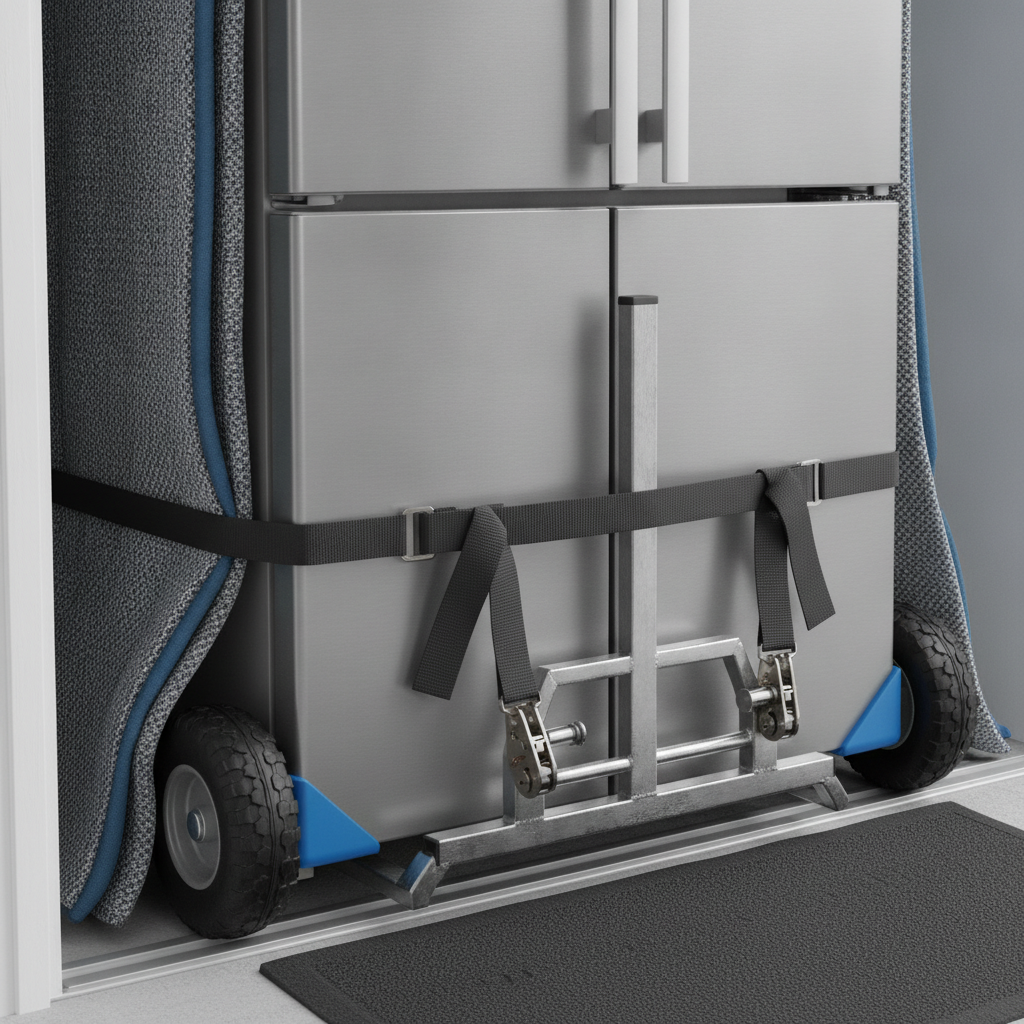
- Use 2–4 heavy-duty straps per large appliance and thick moving blankets
- Team of 2–3 people for most appliances; add a spotter on stairs
Table of contents
- What Is Appliance Moving?
- Why These Tips Matter
- Prerequisites and Safety Checks
- How Appliance Moving Works: Step-by-Step
- Types of Appliances and Methods
- Best Practices and Pro Tips
- Tools and Resources
- Troubleshooting and Common Mistakes
- Case Studies and Real-World Examples
- DIY vs. Pro Movers: Comparison
- Frequently Asked Questions
- Conclusion and Key Takeaways
What Is Appliance Moving?
Appliance moving is the safe preparation, disconnection, protection, loading, transport, and reinstallation of large household machines. It covers power, water, and gas shutoff; surface and floor protection; strapping and dolly use; path planning; and post-move verification so gear runs correctly at the new place.
In our teams’ workflow, appliance moving is a mini-project inside the larger move. It has its own dependencies (defrost, drain, disconnect), materials (blankets, straps, sliders), and milestones (loaded, secured, positioned, reconnected). Treat each appliance like a fragile, heavy instrument, not a box.
- Core phases:
- Assess and schedule prep (12–48 hours lead time for defrost/drain)
- Disconnect utility lines and verify zero-pressure states
- Pad, strap, and stabilize the center of mass
- Navigate the path with a spotter; keep tilt controlled
- Settle, level, and test on arrival
- Common risks:
- Tip-over and crush injuries from top-heavy loads
- Water leaks from un-drained hoses or icemaker lines
- Compressor oil migration if fridges ride flat too long
Why These Tips Matter
These appliance moving tips reduce injury risk, prevent leaks and scratches, and keep warranties valid. Proper prep—defrosting, draining, disconnecting—cuts post-move failures. Good path planning and strapping keep loads balanced so doorways, stairs, and vehicles stay damage-free.
Here’s the thing: appliance damage often happens in the first and last 10 feet—the doorway, the stairs, the truck lift. We’ve found that measured movement, cushioning contact points, and clear verbal cues cut incident rates dramatically.
- Benefits you’ll feel:
- Lower chance of dents, broken trim, or floor gouges
- Fewer post-move surprises like error codes or slow drains
- Faster setup because hoses, cords, and bolts are labeled and bagged
- Numbers you can use:
- Aim for 36 inches of pathway clearance where feasible
- Target 10–15-degree tilt on dollies for control; avoid >45 degrees
- Use two straps minimum; four for wide, tall, or glass-front units
For broader move planning tips that dovetail with this process, see ideas from The UPS Store on preparing ahead and organizing essentials.
Prerequisites and Safety Checks
Before move day, measure paths and doors, create 36-inch walkways, lay floor protection, and stage tools. Defrost fridges 24 hours ahead, drain washers, and label every hose and screw. Confirm power, water, and gas are fully off. Assign roles—lifter, spotter, and door guide—for each path.
Spend 20–30 minutes on this checklist and you’ll save an hour later. The goal is zero surprises: no hidden thresholds, no dangling cords, no loose shelves. We stage supplies in a single “appliance kit” bin so nothing goes missing.
Quick safety checklist
- Measure twice: width x height of each doorway, hallway turns, and stair headroom
- Map the route: mark pinch points and plan handoffs on landings
- Lay protection: floor runners, corner guards, and door jamb pads
- Power off: switch breakers when needed; unplug and coil cords
- Water/gas off: close valves fully; verify zero-flow with a brief test
- Drain and dry: washers, dishwashers, and icemaker lines into a bucket; towel dry
- Empty and secure: remove shelves, trays, lint screens; tape doors closed with painter’s tape
- Team brief: call out roles, voice commands, and rest points
Staging and labeling
- Zip-top bags for screws and brackets; blue tape labels matching the destination room
- Color-code hoses and ports (red for hot, blue for cold); snap a quick phone photo
- Keep an appliance toolkit: adjustable wrench, pliers, hex keys, T20 driver, hose caps
How Appliance Moving Works: Step-by-Step
Successful appliance moves follow a repeatable sequence: prep and disconnect, pad and strap, lift and roll with a rated dolly, navigate the route with a spotter, then set, level, reconnect, and test. Each stage builds safety so the last step—turning it on—works the first time.
Think in phases and handoffs. The lifter controls the dolly, the spotter manages corners and sightlines, and the door guide protects trim and flooring. If a step stalls—say, a stuck water line—pause, cap, and regroup before proceeding.
- Prep and disconnect: defrost, drain, unplug, shut valves, cap lines
- Protect and stabilize: blankets, corner guards, door tape, shelf removal
- Strap and load: 2–4 straps, center-of-mass alignment on an appliance dolly
- Route navigation: controlled tilt, slow ramps, spotter calls, rest on landings
- Truck loading: nose-in against an e-track wall, cross-strapped at two heights
- Arrival setup: position, level front-to-back/side-to-side, reconnect utilities
- Test and verify: leak check, heat/cool cycle test, error code scan
Types of Appliances and Methods
Every appliance has unique risks. Refrigerators need defrosting and upright transport, washers need drum locks and hose care, gas ranges need capped lines, and dishwashers hide water in traps. Use these tailored methods to reduce errors and speed setup.
Below are field-tested methods our crews use on typical kitchen and laundry units. Adapt to your model’s manual when available.
Refrigerators and Freezers
- 24 hours before: empty, power off, prop doors open, and defrost; towel-dry interior
- Remove shelves and drawers; wrap separately to prevent rattling and cracks
- Tape doors closed with painter’s tape; avoid adhesive on stainless steel
- Strap high and low on the dolly; keep upright; limit tilt to maintain compressor oil position
- After delivery: wait 2–24 hours upright before powering on, depending on manufacturer guidance
Washing Machines
- Turn off supply valves; disconnect hoses; drain into a bucket; remove inlet screens if needed
- Install transit bolts or drum locks to prevent internal suspension damage
- Coil and tape the power cord; secure door; use blankets to pad the sides
- Keep near-upright on the dolly; avoid sharp jolts on stairs
- On arrival: level feet; reconnect hot/cold; run a short rinse to confirm no leaks
Dryers (Electric and Gas)
- Electric: unplug; remove vent hose; clean lint trap and vent tube
- Gas: shut the gas valve fully; disconnect flexible connector; cap both ends; ventilate area
- Pad and strap; protect the control panel and glass doors
- Reinstall with a new vent hose when possible for better airflow
Ranges and Ovens
- Remove and wrap grates and burner caps; tape oven door
- Gas: shut valve; disconnect and cap; avoid torque on rigid lines
- Electric: switch breaker if needed; unplug or hardwire disconnect by a qualified person
- Use a forearm forklift strap pair or a leveled appliance dolly to keep it balanced
Dishwashers
- Shut water; unplug; remove kick plate; disconnect supply and drain; tip slightly to release trap water
- Protect floors from drips with a pan and towels
- Pad the stainless front; secure door; avoid kinking the drain hose
- On install: replace worn gaskets; test for drips during the first fill
Specialty and Built-Ins
- Wine coolers: secure racks and glass; avoid strong tilts
- Microwave/hood combos: support the underside; protect mounting brackets
- Built-in fridges/dishwashers: document panel screws and trim; bag hardware by section
Best Practices and Pro Tips
Protect contact points, control the center of mass, and move methodically. Use blankets and corner guards, keep tilt small, communicate clearly, and strap at two heights. Drain, defrost, and label in advance so reconnecting takes minutes, not hours.
We train crews to “slow is smooth, smooth is fast.” Most dents happen when speed replaces communication. Build in two-minute pauses at pinch points.
- Surface protection:
- Runner length should cover the full route; add extra at turns
- Hardboard sheets bridge thresholds and protect soft floors
- Load control:
- Strap high for top-heavy units; add a mid-strap to stop sway
- Keep wheels inside runner edges; avoid sudden tilt changes
- Communication:
- Use simple calls: “tilting,” “stopping,” “step down,” “clear”
- One leader speaks on stairs; others repeat calls to confirm
- Post-move recovery:
- Level to within a bubble in both directions before connecting lines
- Refrigerators: wait upright time before powering on
Tools and Resources
Use a rated appliance dolly, 2–4 heavy-duty straps, thick moving blankets, corner guards, floor runners, hose caps, and a basic plumbing/electrical toolkit. A second dolly or forearm straps help on stairs. Keep a bucket, towels, and leak detector spray nearby.
The right kit transforms a risky lift into a controlled roll. Even one missing item—hose caps, for example—can cause a leak that delays the truck by 30 minutes. Stage these items in one bin.
- Movement and protection: appliance dolly, sliders, ramps, floor runners, hardboard sheets
- Securing: 2–4 ratchet straps, stretch wrap, painter’s tape, blankets
- Disconnect kit: adjustable wrench, pliers, screwdriver set, hex keys, hose caps, Teflon tape
- Safety: work gloves, eye protection, leak detector spray, non-slip shoes
For more context on handling laundry units, an industry overview from Galaxy Movers Calgary outlines how pros simplify washer/dryer moves—useful background while you build your own checklist.
Troubleshooting and Common Mistakes
If a step fails, stop and stabilize the unit first. For leaks, recap lines and re-tighten. For stuck doors, release latches and check tape. For tight turns, remove doors from hinges or switch to sliders. Never force a top-heavy load through a pinch point.
Most issues have simple fixes if you pause early. Here are the ones we see most.
- Water drips after disconnect
- Cause: residual water in hoses or traps
- Fix: drain into a bucket; cap both ends; towel-dry; keep a pan under the unit
- Refrigerator humming or not cooling after arrival
- Cause: moved on side or powered too soon
- Fix: leave upright 2–24 hours; verify level; then power on and monitor
- Washer shakes violently on first cycle
- Cause: missing transit bolts during transport or not removed after install
- Fix: install locks before move; remove them before use; level feet
- Gas smell after connecting a range or dryer
- Cause: loose connector or worn gasket
- Fix: shut valve; ventilate; check fittings; use leak detector spray; replace worn parts
- Unit won’t fit through a doorway
- Cause: missed measurements or hidden trim
- Fix: remove fridge doors or internal doors; rotate 90 degrees; use sliders and a wider arc
- Scratches on floors or walls
- Cause: unprotected contact points or rushed turns
- Fix: add corner guards and runner overlays; slow down; add a dedicated spotter
Case Studies and Real-World Examples
Real moves succeed on sequencing, teamwork, and staging. These snapshots show how labeled hardware bags, floor protection at pinch points, and staged toolkits prevented leaks, dents, and delays—so appliances started up cleanly after the move.
We’ve helped homeowners and businesses relocate everything from compact washer/dryer pairs to oversized built-in fridges. A few quick scenarios:
- Family kitchen refresh
- Challenge: 90-degree stair turn with a French-door refrigerator
- Solution: removed doors and shelves, used a mid-landing rest, strapped high/low
- Result: zero wall contact; powered on after a 12-hour upright rest
- Starter home laundry stack
- Challenge: stacked washer/dryer in a closet with a narrow hallway
- Solution: separated units; capped lines; used sliders to stage, then dolly
- Result: single-pass exit; leak-free reconnect and balanced spin on test
- Office kitchenette move
- Challenge: daytime move through active corridors
- Solution: added a spotter for pedestrian traffic; extended runner length
- Result: no scuffs at 10+ door frames; coffee station live same day
DIY vs. Pro Movers: Comparison
DIY works for simple paths and fully prepped appliances. Pro movers add value when there are stairs, tight turns, gas lines, built-ins, or multiple large units. If you lack the tools, transit bolts, or a safe plan, hire licensed and insured specialists.
| Factor | DIY Approach | Professional Movers |
|---|---|---|
| Tools & protection | May rent basic dolly and blankets | Appliance dolly, e-track truck, full pads, guards, ramps |
| Connections | Comfortable with simple unplug/drain tasks | Experienced with tricky drains, tight gas fittings, leveling |
| Path complexity | Single-floor, wide paths preferred | Stairs, tight turns, elevators, long carries |
| Risk tolerance | Accepts learning curve and time trade-offs | Minimizes damage risk with proven procedures |
| Team size | Often 2 people | 2–3 plus a dedicated spotter when needed |
If you prefer a done-for-you plan with trained, licensed, and insured crews, our teams manage packing supplies, specialty handling, and the whole move end-to-end.
Need a hand with appliances? Get a fast video quote and a custom moving plan from a licensed, insured team that handles packing supplies, specialty items, and on-time delivery.
See how appliance moves are structured to plan your timeline and prep list.
Frequently Asked Questions
These short answers clear up the most common appliance moving questions: how long to defrost, when to use transit bolts, how to handle gas lines, and whether dishwashers need draining. Use them as quick checks while you prep.
How long should I defrost a refrigerator before moving?
Plan for about 24 hours. Empty food, power it off, prop the doors, and place towels to absorb melt. Dry the interior and remove shelves before you wrap and strap the unit upright on a dolly.
Do I really need transit bolts for my washing machine?
Yes, for front-loaders and many high-efficiency units. Transit bolts lock the drum and suspension for transport, preventing internal damage. Install them before moving and remove them after leveling at the new location.
Can I lay a refrigerator on its side to move it?
Avoid it when possible. Keeping fridges upright prevents compressor oil from migrating. If it must go on its side briefly, keep the correct side up per the manual and let it sit upright 2–24 hours before powering on.
How do I handle gas connections on ranges or dryers?
Shut the gas valve completely, disconnect carefully, and cap both the line and the connector. Ventilate the area. If you’re unsure about fittings or smell gas after reconnecting, pause and have a qualified technician inspect.
What’s the safest way to move appliances down stairs?
Use an appliance dolly with straps, add a spotter, and keep tilt minimal. Take one step at a time, pausing to rest on landings. Protect rails and jambs with blankets and corner guards to avoid scuffs and snags.
Conclusion and Key Takeaways
Great appliance moves are planned, not improvised. Prep early, protect surfaces, control the center of mass, and move with clear roles and calls. When in doubt—especially with gas lines, tight turns, or multiple heavy units—bring in licensed and insured professionals.
- Key takeaways:
- Defrost, drain, and label ahead of move day
- Use the right equipment: appliance dolly, straps, and protection
- Control tilt and pace; assign a spotter
- Level and test on arrival before full use
- Call pros for complex paths, built-ins, and gas connections
If you want a stress-free option, our trained, licensed, and insured teams handle packing supplies, specialty items, and full-service moves with an on-time delivery focus—backed by 24/7 support and a simple video-quote process.